Great things come in small packages!
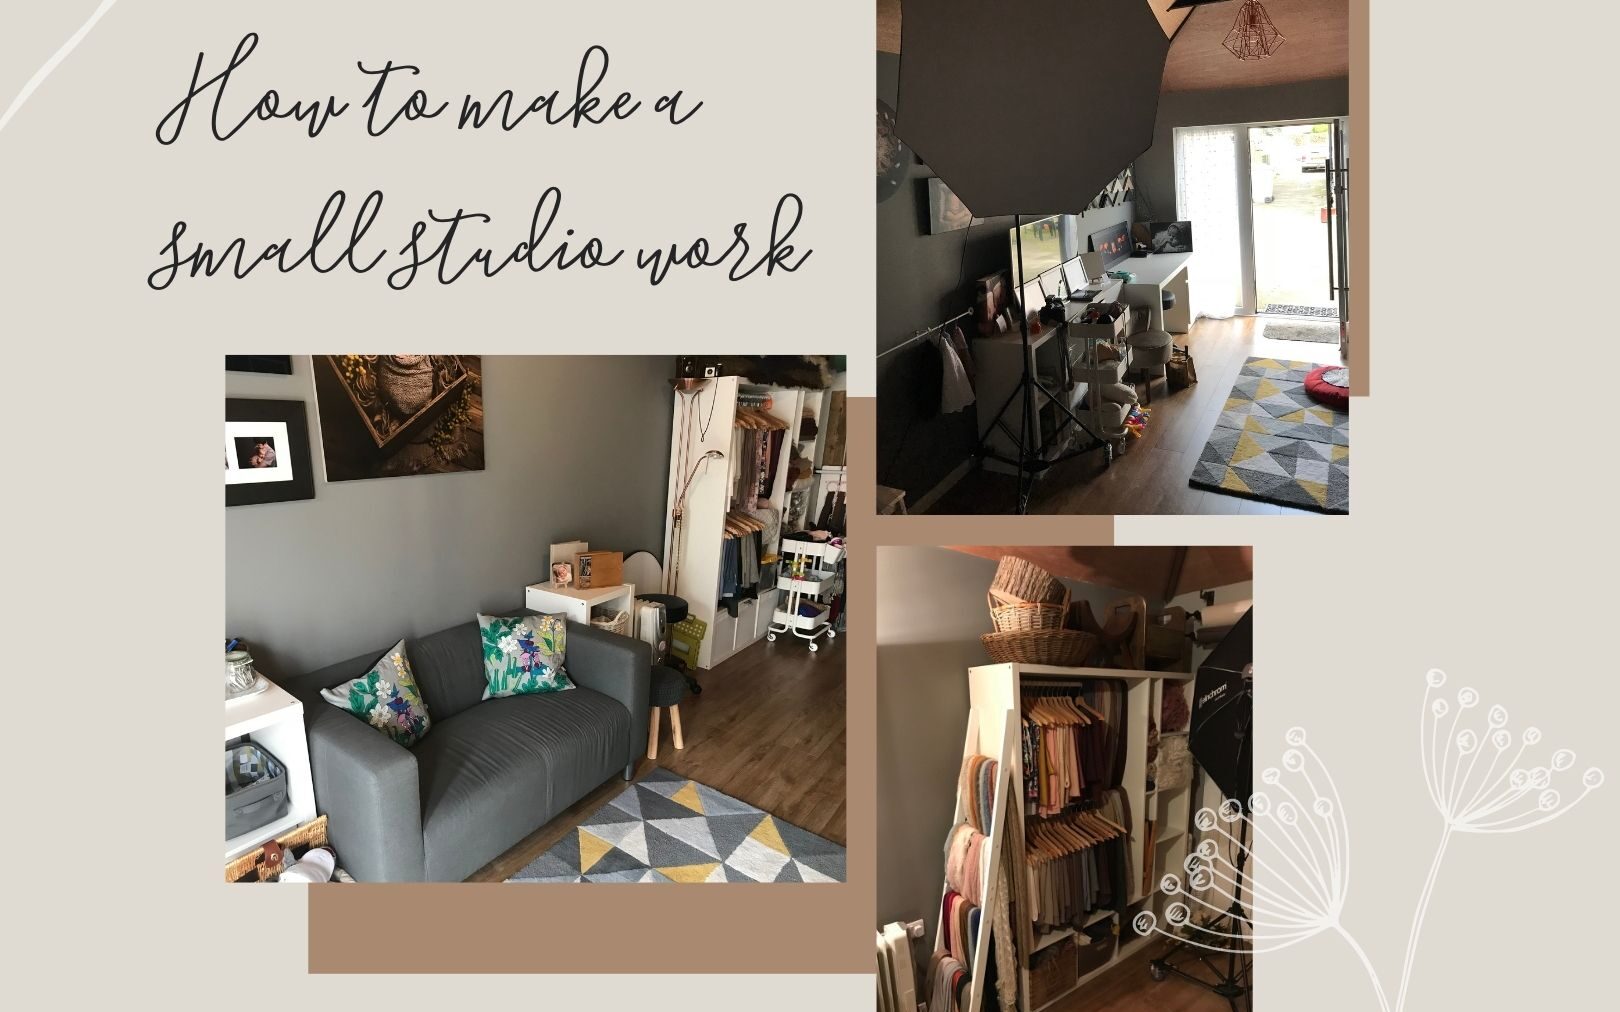
My studio is a converted garage in our back garden. It’s 5.8m by 3.2m so it’s not tiny but it’s certainly not a patch on some high street studios. However, I’ve made the space work for me and I wanted to share with you some of these techniques.
The main thing for me is storage. I use a TV cabinet from Ikea which is tipped on it’s side and inside that I’ve attached two clothes rails. This is for all my fabric backdrops and some little outfits. It’s wonderful to see them all on display so easily and it’s a pleasure to select which items to use for each shoot. Attached to the side of this I have my headband collection on tiny hooks from amazon.


My roll down backdrops are on a standard wall fitting with rollers so they are really convenient and easy to change within sessions and my wooden backdrop is connected to the wall so it can be put up and brought down with ease.
I keep the main light that I use on wheels (Elinchrom D-lite One) so I can easily move it around within the space. When designing the studio I knew I’d need a lot of headroom for this light so we made the ceiling as high as it would possibly go to allow overhead lit shots.


There’s space for me to have a desk, a unit with a TV on for viewing sessions, a seating area for parents and even a small sink and refreshments area. When I’m shooting portraits and I need to be really far away, I stand right by the door to the studio and shoot down the full length. This allows me to use my 135mm and 85mm lenses with ease.
You can also see from these images I’m lucky enough to have a large store cupboard at the end of the studio. The door to this is usually covered with backdrops but it’s so conventient to be able to put larger props in there. I can also stash furniture in there if I need a lot of space for Christmas mini sessions etc.
Finally, I truly believe that my little posing bed is key to a small set up. I tried beanbag after beanbag and I was struggling with space and having to lug them around into my store cupboard mid-session. Now I can sit on the floor with my legs under the bed while I pose my beautiful baby clients then just fold it up against the wall for the rest of the session. I even use it for older babies, sitters, sibling shots etc. It’s so versatile. You can read my blog all about how I made my posing bed myself right here.
I hope you love my little video about my studio and this short blog. I feel like I could blather on for hours about it but I wanted to keep it brief. If you have any questions about it just shout! I also offer one-to-one training to fellow photographers and this could include information about creating your own studio. It’s so handy to be able to work from home. If you’d like more information, just drop me a message.


